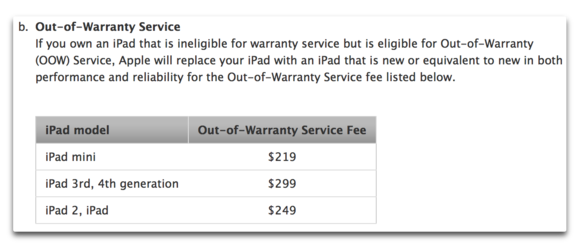
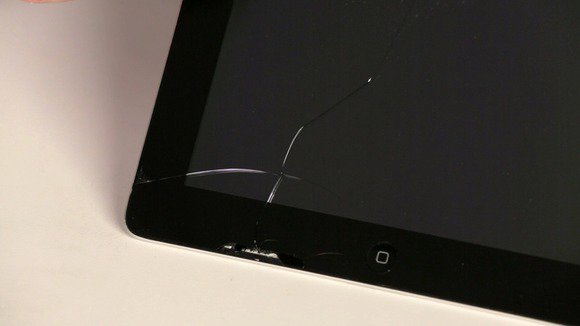
iPads are great for kids, but kids aren?t always that good for iPads. One stray elbow, and your pristine tablet has a spider web of cracks dancing across its screen. No matter how careful we try to be, a cracked or shattered screen is just one accident away. If you paid the $99 for AppleCare+ for your iPad (available only�within 30 days of purchase), and your tablet suffers accidental damage, Apple will replace your broken iPad up to twice, for $49 each time, during the two-year coverage period. Otherwise, getting it fixed by Apple can cost you $200 to $300 dollars. There are also plenty of third-party mail-in or drop-off services (if you?ve been to a mall lately, you?ve probably noticed a kiosk that fixes phones and tablets), but there?s another, more hands-on way to go: Fix the broken screen yourself.

You?ll need to procure a replacement screen, which will most likely also have a digitizer attached to it. The digitizer is what translates your taps and gestures into input on the iPad. If your LCD panel is also damaged, you can replace that at the same time (the LCD panel sits right underneath the front glass). But for just the screen and the digitizer, you can pick up a kit online in the $50 to $100 range. You can also take this opportunity to switch from a black iPad model to a white one, if you like. We bought this screen for our damaged iPad 2 on Amazon for $30. It came with no instructions of any kind, and the reviews from buyers suggested seeking out YouTube videos to walk you through the process.

Once you have the necessary replacement parts, I recommend taking the time to read through iFixit?s excellent guide to replacing the front panel. iFixit uses a special microwavable pouch that gets hot to loosen the adhesive holding the screen to the rest of the iPad, but a heat gun can work just as well, which is what the Macworld Lab used (or you can even use a hair dryer if you?re really roughing it). Also note, some videos online mention the use of an X-Acto knife or a scalpel to separate the front panel from the iPad body, but I highly recommend using something less destructive, like the guitar picks that iFixit opts for. I ended up accidentally damaging two cables (one for power/volume/toggle, and the other for the Bluetooth/Wi-Fi module) as a result of confusing directions, use of a razor, and the fact that this iPad was purchased refurbished from a third-party and clearly had already undergone a poorly executed screen replacement.

Pay special attention to the cables that run right next to the front glass panel. If you make a mistake and damage them, replacement is possible, but you?ll have to order new parts. The slower you proceed, the more likely you are to perform the repair without error.
To read this article in full or to leave a comment, please click here
iPhone insurance worth iPhone insurance plan buy iPhone iPhone insurance app rates phone and communications
Walang komento:
Mag-post ng isang Komento